How to add subtitles.
Put captions on videos.
Upload a video, click Generate subtitles, and review the captions over the picture. This guide shows you how to put captions on videos, how to add subtitles to a downloaded video, and how to attach subtitles to a movie. The walkthrough below uses our own 15-second English clip with no existing subtitles. Download the source, follow the screenshots, and compare the actual exported videos.
Add subtitles to your video in 3 steps
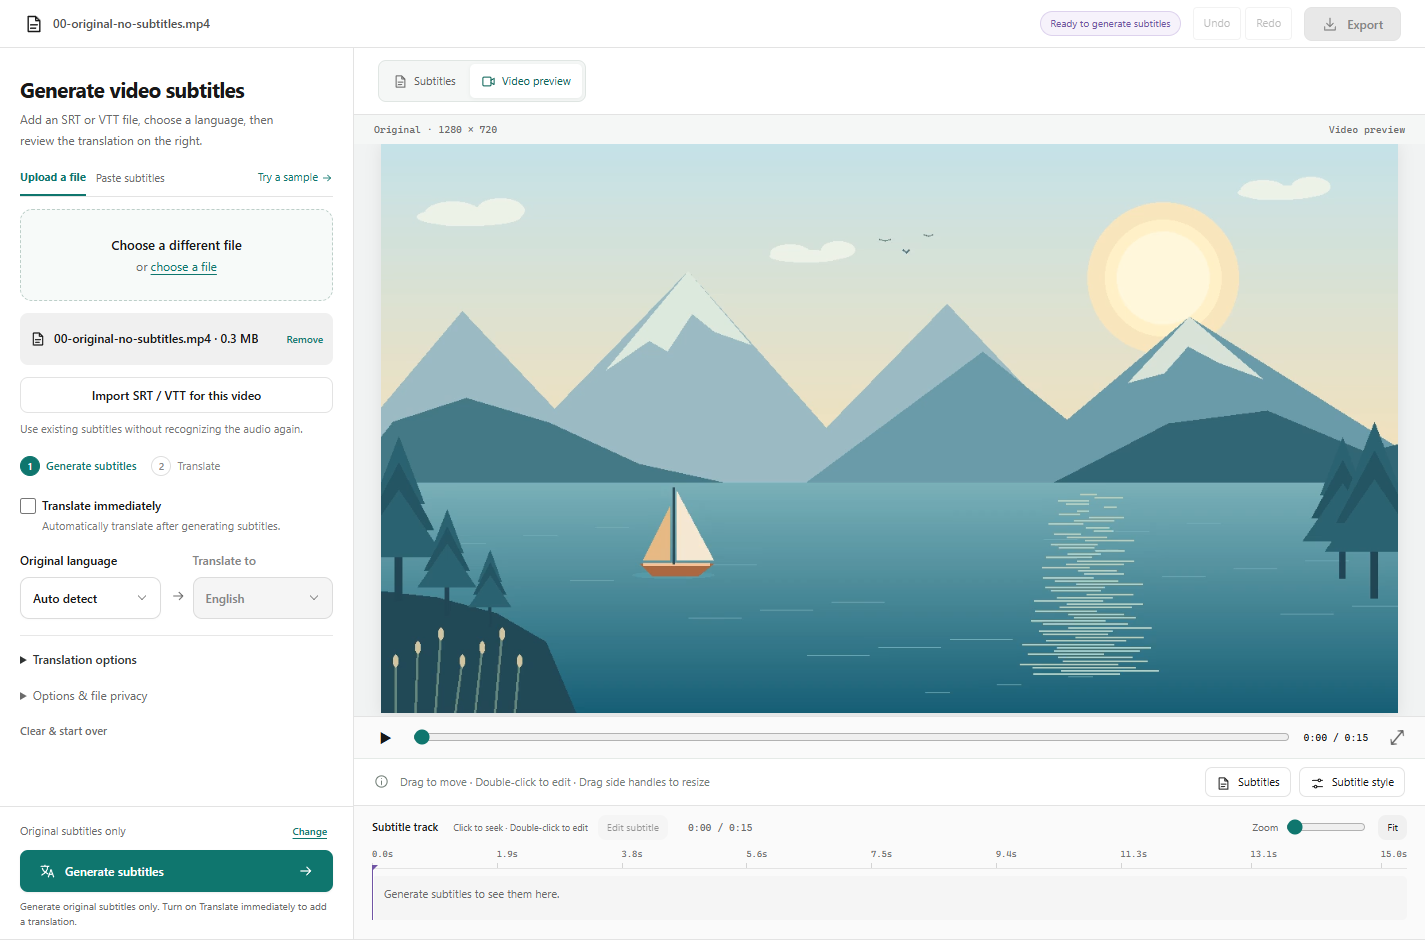
Open the subtitle translator on the homepage. For English captions from English speech, leave Translate immediately unchecked. This generates the original-language subtitles first and does not request a translation.
Choose your video
Under Upload a file, choose an MP4, MOV, MKV, WebM or M4V video. The filename appears on the left and Video preview opens on the right. This example uses the downloadable 15-second source video below.
Step 1 — The original clip is selected. Translate immediately is unchecked; no translation is requested. Click Generate subtitles
Click Generate subtitles at the bottom of the input panel. Wait while the video uploads and speech recognition runs. The button shows Generating subtitles during processing. Processing time depends on the clip and available server capacity.
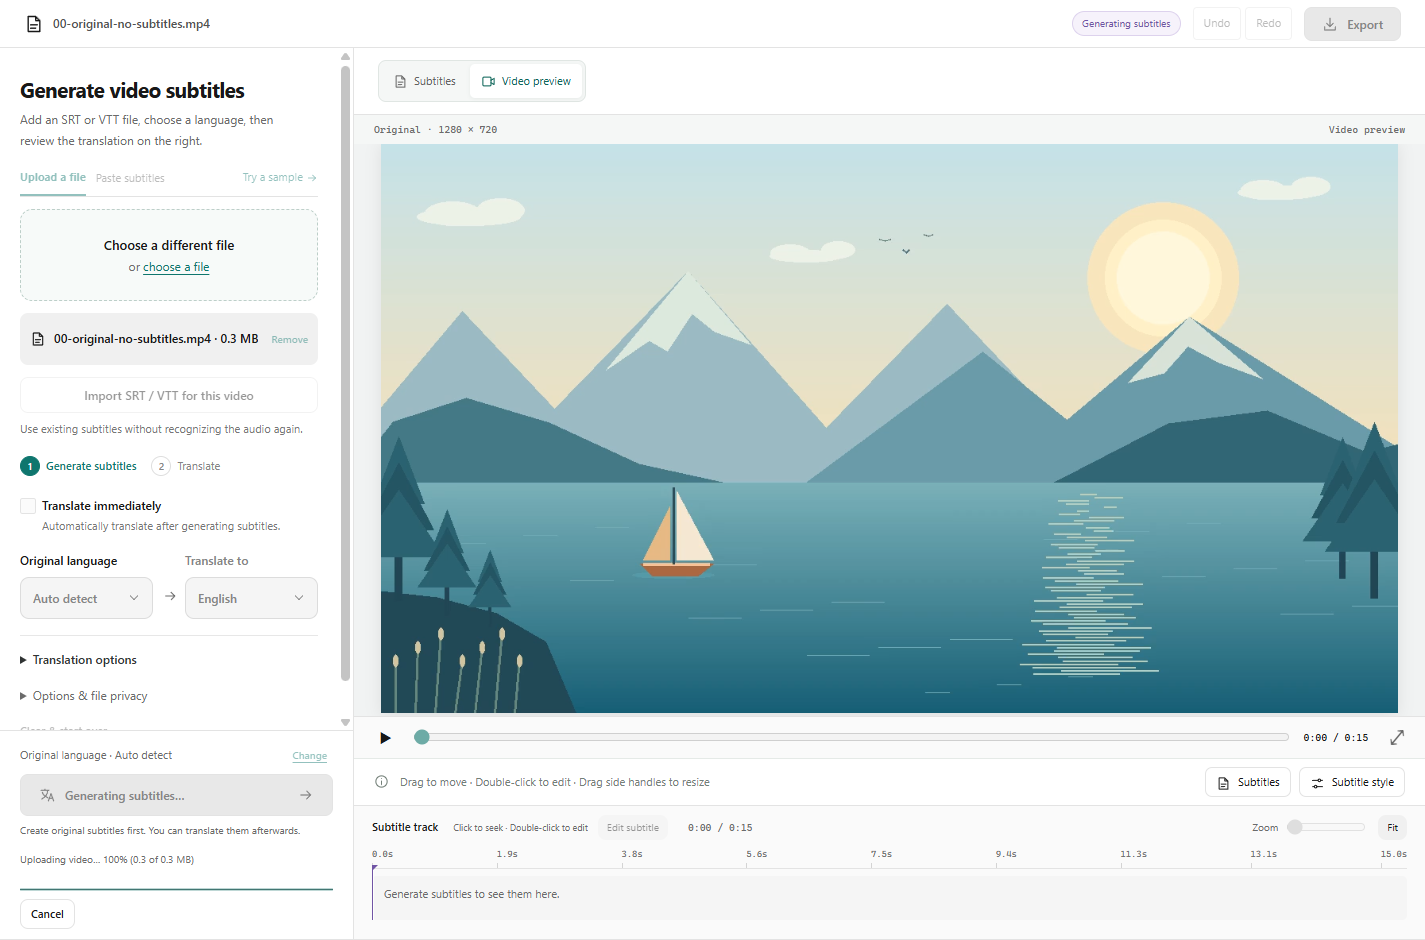
Step 2 — A real generation request in progress. The upload controls are disabled while speech is recognized. Play the result and export your MP4
Play Video preview to review the words and timing. Our example produced 3 English cues; the preview shows each short phrase over the video. To save the captioned video, choose Export → Subtitled video → Generate MP4 → Download MP4. Choose Subtitle file instead to save SRT or VTT.

Step 3 — Actual generated English subtitles in Video preview. The words are editable before MP4 or subtitle-file export.
Watch the original, English captions and Japanese translation
Compare the actual MP4 exports side by side: first the video before and after caption generation, then the captions before and after translation. English captions were recognized from speech. Japanese captions were translated from that text; the English voice was retained. To translate your generated video captions, enable Translate immediately to unlock Translate to, choose a target language, and click Translate subtitles. This changes the captions, not the spoken voice.
Keep the subtitle file as well as the video
We uploaded the exported English SRT, chose English as the source language and Japanese as the target, then clicked Translate subtitles. All three cue numbers and start/end timestamps matched after export. We paired that Japanese SRT with the original video and exported the Japanese-captioned MP4. Expand the line-by-line comparison above to inspect the actual text.
| Output | Result | What it contains |
|---|---|---|
| Original video | 1280 × 720 · 15 seconds | English synthesized narration; no captions |
| English MP4 | 1280 × 720 · H.264 / AAC | Recognized English captions burned into frames |
| Japanese MP4 | 1280 × 720 · H.264 / AAC | Translated captions; English audio retained |
| English / Japanese SRT | 3 cues in each file | Identical cue numbers and timestamps |
How to save subtitles to video: soft vs embedded vs burned-in
When you add subtitles, you have three options for how to save subtitles to video. Soft subtitles are separate SRT or VTT files placed alongside your video. The player loads them when you open the video. Embedded subtitles (subtitle embedding) are text tracks stored inside an MKV or MP4 container—the subtitle data travels with the video file, and most players let viewers toggle them. Burned-in subtitles are drawn directly onto the video frames during encoding, becoming part of the picture permanently. How can I add subtitles to a movie or how can I put subtitles on a movie? Choose the method that fits your distribution.
- Keep the original SRT file regardless of which method you choose. You can always re-export the video with different settings later.
- Social media platforms (Instagram Reels, TikTok) do not support separate subtitle files—burn captions into the video for these destinations.
- YouTube and Vimeo accept SRT uploads, making soft subtitles the fastest option for these platforms.
- Embedded subtitles work best for personal video libraries where you want subtitles to travel with the file without needing to manage separate text files.
| Method | Viewer control | File portability | Best for |
|---|---|---|---|
| Soft subtitles (SRT/VTT) | Can toggle on/off | Requires matching filename | YouTube, Vimeo, desktop players, web video |
| Embedded tracks | Can toggle on/off | Travels with video file | MKV libraries, professional delivery, multi-language releases |
| Burned-in captions | Always visible | Works everywhere | Instagram, TikTok, messaging apps, email attachments |
Method 1: Burn subtitles into video with HandBrake
HandBrake is free, open-source video encoding software for Windows, macOS and Linux. It can burn SRT subtitles directly into video frames or embed them as a soft track inside the output file. After testing dozens of subtitle workflows for our own tool, we consistently recommend HandBrake for desktop users—it's reliable, well-documented, and handles edge cases (like non-ASCII filenames and unusual frame rates) better than most alternatives.
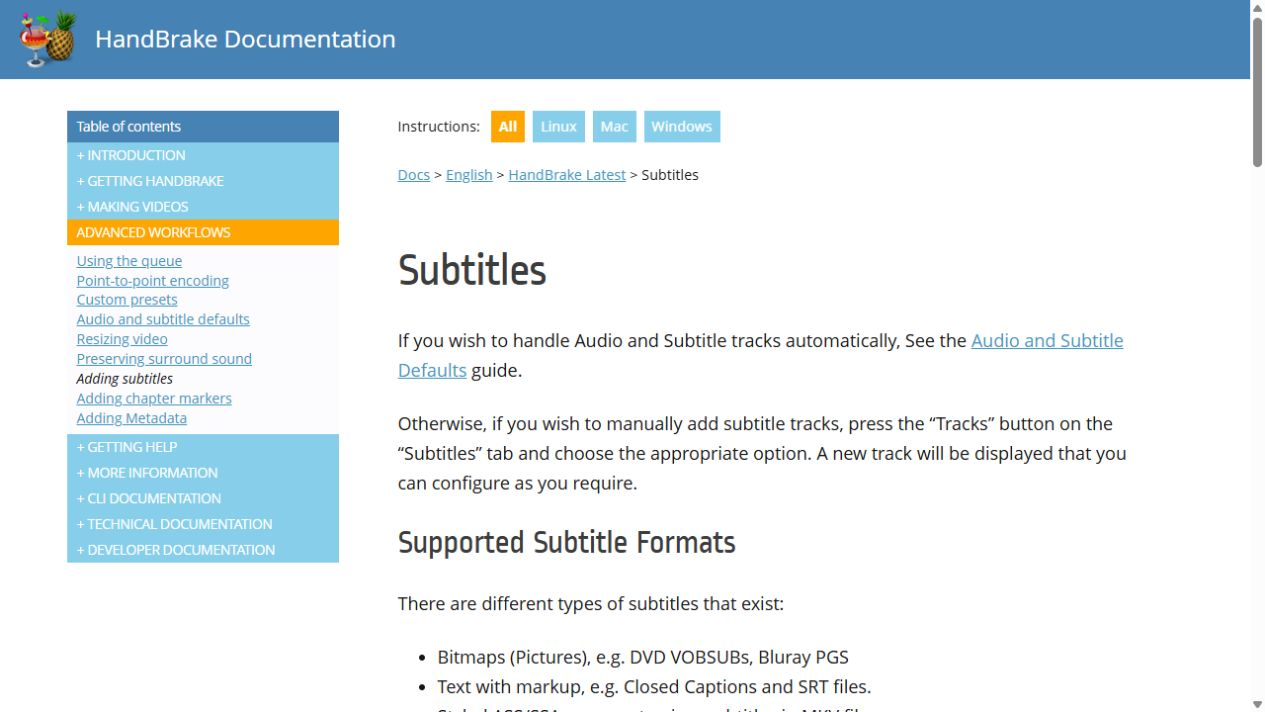
- Download HandBrake from handbrake.fr and install it.
- Open your video file in HandBrake.
- Open the Subtitles tab and use the Tracks menu to add your subtitle file; menu labels can vary by version.
- Check the "Burn In" box to make subtitles permanent, or leave it unchecked to create an embedded track.
- Choose MP4 or MKV as the output format. MP4 with burned-in subtitles works on any device.
- Click Start Encode. A 5-minute 1080p video typically takes 3-5 minutes to encode with subtitles burned in.
Method 2: Add soft subtitles without re-encoding (FFmpeg)
FFmpeg can embed an SRT file as a soft subtitle track inside an MP4 or MKV container without re-encoding the video. This is faster than HandBrake because the video frames are copied as-is. The subtitle file is converted to mov_text format for MP4 compatibility.
- Video quality remains identical to the source because frames are not re-encoded.
- Processing time is typically under 1 minute for a 10-minute video since only the subtitle data is being converted.
- The output file size is nearly identical to the input, plus a few kilobytes for the subtitle track.
- Most players (VLC, MPV, QuickTime with plugins, modern TVs) will display the embedded subtitle track with a toggle option.
ffmpeg -i video.mp4 -i subtitles.srt -map 0:v -map 0:a -map 1:0 -c:v copy -c:a copy -c:s mov_text output.mp4Method 3: Burn subtitles into frames with FFmpeg
To make subtitles permanently visible, use FFmpeg's subtitles filter. This re-encodes the video with text drawn onto each frame. The result works in any player, including those without subtitle support.
- Burned-in subtitles are visible in every player, including mobile apps, email attachments and social media.
- Re-encoding takes longer than soft subtitle embedding—expect 5-10 minutes for a 10-minute 1080p video on a modern computer.
- The output file will be larger than the source if you use high quality settings (CRF 18-20), or smaller if you use compressed settings (CRF 23-28).
- Once subtitles are burned in, they cannot be removed or edited without re-encoding the original video again.
ffmpeg -i video.mp4 -vf "subtitles=subtitles.srt" -c:v libx264 -crf 18 -c:a copy output.mp4Uploading subtitles to YouTube
YouTube accepts SRT and VTT subtitle uploads through YouTube Studio. This is faster than burning subtitles into your video and lets viewers toggle captions on or off. YouTube also offers auto-sync for transcripts and auto-generated captions, but uploading a properly timed SRT file gives you more control over accuracy and formatting.
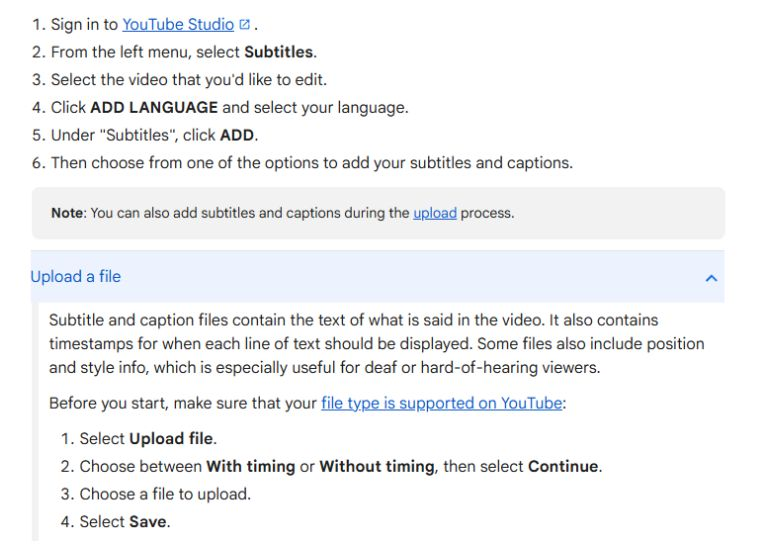
- Go to YouTube Studio → Content → select your video → Subtitles.
- Click the language you want to add subtitles for (or add a new language).
- Choose "Upload file" and select "With timing" if your SRT file already has timestamps.
- Upload your timed SRT using With timing. The supplied cue timestamps determine when captions appear; Auto-sync is a different option.
- Preview the subtitles by playing the video in YouTube Studio. You can edit text and timing in the inline editor.
- Publish the subtitles when ready. They will appear in the video player's caption menu.
Subtitle timing and readability standards
Professional subtitle guidelines exist to ensure captions are readable at any video size. Netflix, BBC and broadcast standards recommend specific line lengths, reading speeds and display durations. Following these standards makes your subtitles accessible to a wider audience.
- Keep lines under 42 characters. Netflix uses this limit for English subtitles. Longer lines force awkward breaks or run off-screen on mobile devices.
- Reading speed: aim for 17-20 characters per second. Netflix recommends 20 CPS maximum for adults and 17 CPS for children. Faster speeds become difficult to follow.
- Display duration: show each subtitle for at least 1 second and no more than 6 seconds. Viewers need time to read, but captions that linger too long feel disconnected from speech.
- Break lines at natural phrase boundaries. "The cat sat on the mat" broken as "The cat sat / on the mat" is easier to read than "The cat / sat on the mat."
- Leave a 2-frame gap (about 80 milliseconds) between consecutive subtitles. Back-to-back captions with no gap make transitions hard to register.
Styling burned-in captions for readability
When burning subtitles into video, font choice, size, color and positioning affect how easily viewers can read the text. Use these standards from broadcast and streaming guidelines to ensure captions work over any background.
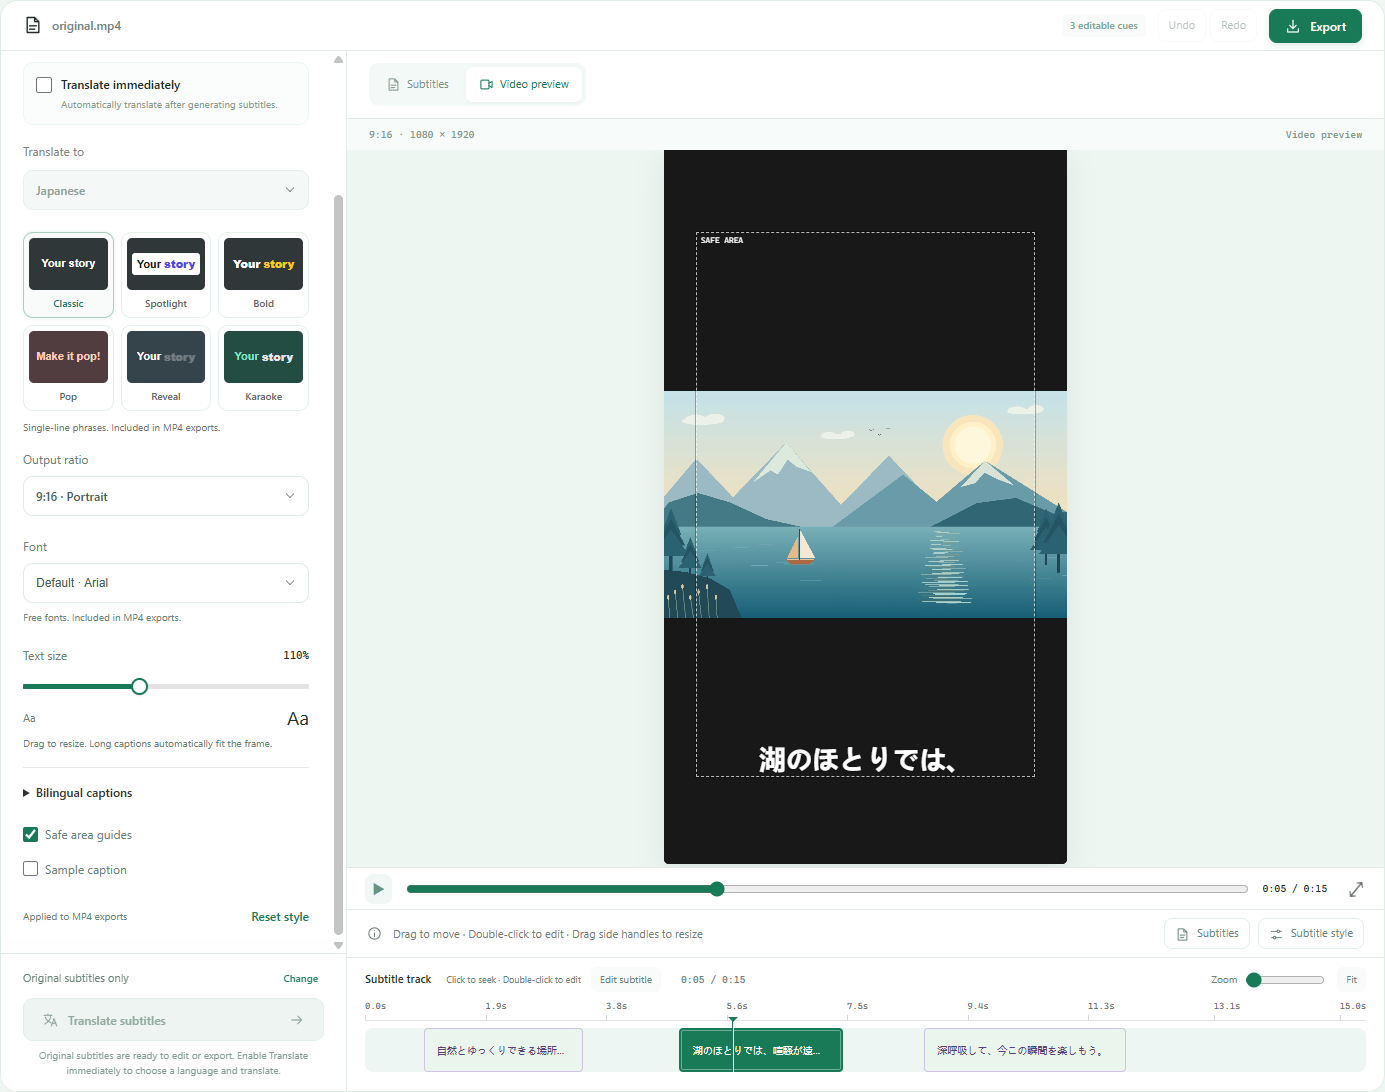
- Font: Use sans-serif typefaces like Arial, Helvetica or Roboto. Serif fonts (Times, Georgia) are harder to read at subtitle sizes.
- Size: Set font size to 5-7% of the video height. For 1080p video, this is roughly 54-75 pixels. Test on a phone screen to verify readability.
- Color: White text with a black outline or drop shadow works over most backgrounds. For bright scenes, add a semi-transparent black box behind the text.
- Position: Bottom center is standard. Keep captions at least 10% of frame height away from the bottom edge to avoid cropping on TVs or mobile player controls.
- Avoid placing captions over faces or important on-screen text. Professional subtitle editors move captions dynamically to avoid blocking key visuals.
Common subtitle problems and solutions
Subtitles that do not display, show wrong characters, or appear out of sync are usually caused by file encoding, timing offsets or format mismatches. Here are the most common issues and their fixes.
- Subtitles not showing in VLC or desktop player: Verify the SRT filename exactly matches the video filename (film.mp4 requires film.srt). Check that the SRT file is saved as UTF-8 encoding. Open the SRT in a text editor—if you see strange characters, re-save as UTF-8 without BOM.
- Random characters (� or boxes) in subtitle text: The file is not UTF-8 encoded. Open it in Notepad or Sublime Text, choose File → Save with Encoding → UTF-8, and reload it in the player.
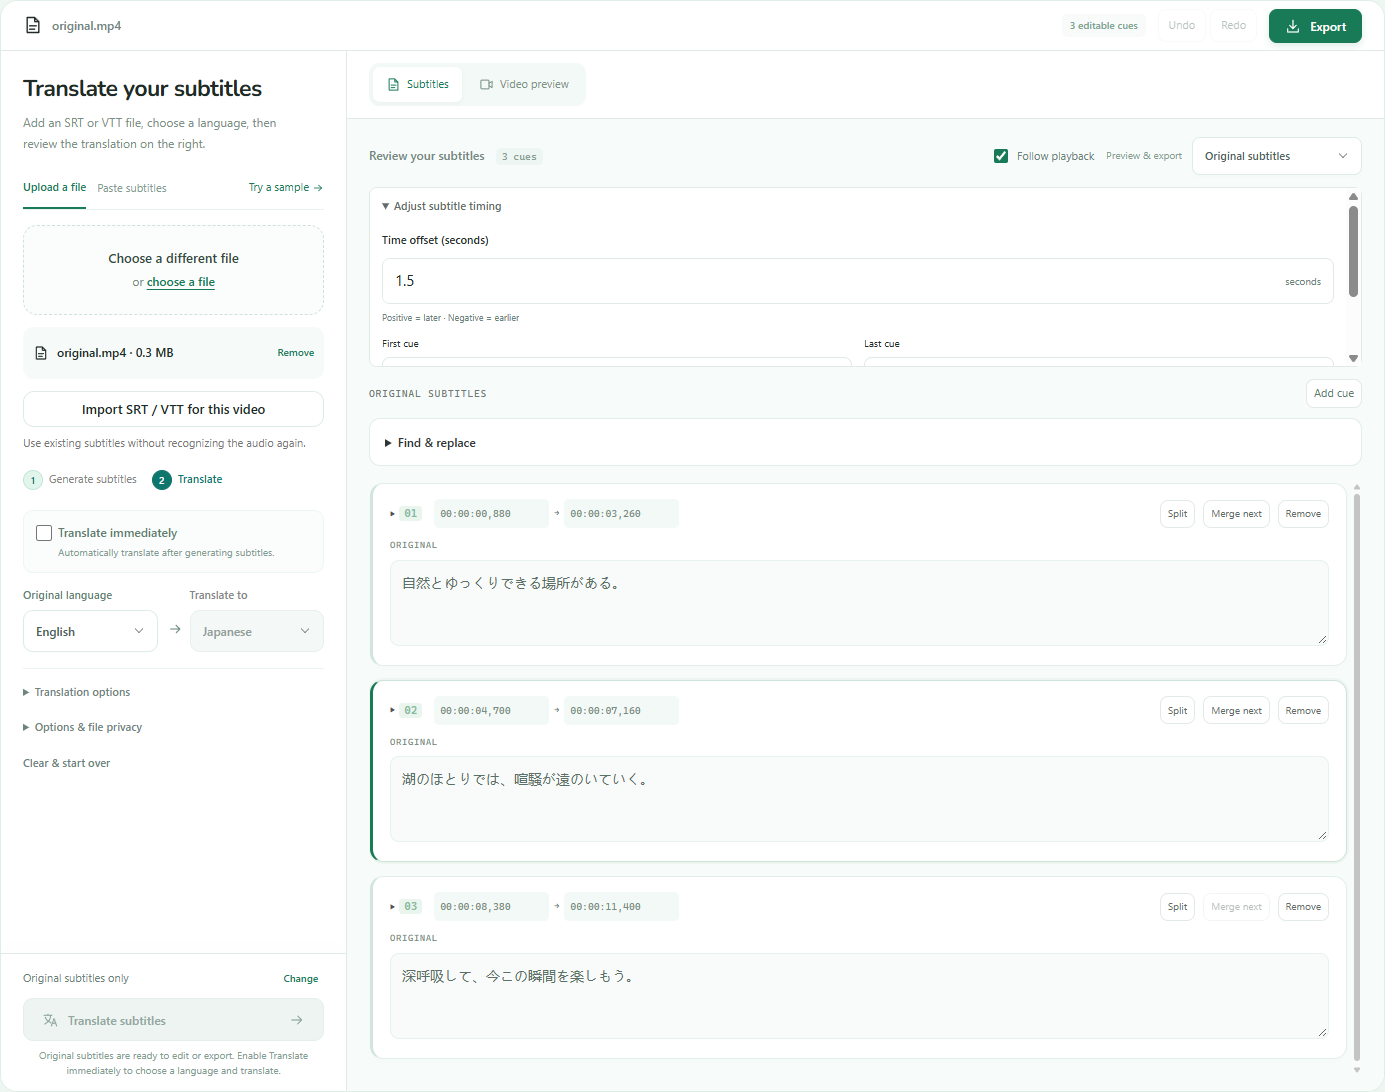
- Subtitles out of sync with video: Use a subtitle shifter to apply a time offset. If the delay grows over time, the SRT file may be for a different version of the video (extended cut, PAL speedup). Verify you have the correct SRT for your video file.
- Web browser does not load VTT subtitles: Check the browser console (F12 → Network tab). If the VTT file returns 404, verify the file path. If it loads but does not display, check that the file starts with "WEBVTT" on line 1 and the server sends MIME type text/vtt.
- HandBrake burned subtitles look blurry: You encoded at too low a resolution or used a fast preset. Re-encode at 1080p with the "High Profile" preset for sharper text.
Accessibility requirements for captions
Captions for accessibility (serving deaf and hard-of-hearing viewers) have stricter requirements than entertainment subtitles. WCAG Level AA requires captions for all video with meaningful audio. Broadcast standards (FCC in the US, Ofcom in the UK) mandate accurate, synchronized and complete captions.
- Include sound descriptions: [door slams], [phone ringing], [suspenseful music]. These give context that hearing viewers get from audio.
- Identify speakers: Use speaker labels (Alice:) or position captions near the speaker on screen. This helps viewers follow multi-person dialogue.
- Indicate tone and emphasis: Use italics for emphasis or ALL CAPS for shouting (sparingly). These convey meaning that tone of voice provides to hearing viewers.
- WCAG 2.1 Level AA requires captions for prerecorded video with audio. Level AAA requires audio descriptions for visual content. Check W3C guidelines for exceptions and specific requirements.
- FCC rules (US broadcast) require captions to be accurate, synchronous, complete and properly placed. Professional captioning services like Rev or 3Play Media ensure compliance.
A few good
questions.
How do I add subtitles to a video for free?+
Use HandBrake (free open-source software) to burn SRT subtitles into an MP4. Download HandBrake, import your video and SRT file, check "Burn In" on the Subtitles tab, and click Start Encode. Alternatively, use FFmpeg command-line tools or upload to an online subtitle tool that offers free tier processing.
Can I add an SRT file to an MP4?+
Yes. Use FFmpeg to embed the SRT as a soft subtitle track (subtitles can be toggled) or burn it into the video frames (permanently visible). For soft subtitles: ffmpeg -i video.mp4 -i subs.srt -c copy -c:s mov_text output.mp4. For burned-in: ffmpeg -i video.mp4 -vf "subtitles=subs.srt" -c:v libx264 -crf 20 output.mp4.
What is the difference between burning in subtitles and embedding them?+
Burning in draws subtitle text onto video frames permanently—viewers cannot turn it off. Embedding stores subtitles as a separate track inside the video file—viewers can toggle it on or off in the player menu. Burned-in subtitles work everywhere; embedded subtitles require player support.
How do I add subtitles to a YouTube video?+
Upload your video to YouTube, go to YouTube Studio → Content → select the video → Subtitles → Upload file. Choose "With timing" and upload your SRT file. YouTube syncs it automatically. Preview and publish when ready. Viewers will see the captions in the player's CC menu.
Why are my subtitles not showing in VLC?+
Check that the SRT filename matches the video filename exactly (case-sensitive on Mac/Linux). Verify the SRT is saved as UTF-8 encoding. If the player still does not load subtitles, manually add them: right-click the video → Subtitle → Add Subtitle File → select your SRT.
How long does it take to burn subtitles into a video?+
Burning subtitles requires re-encoding the video. A 10-minute 1080p video typically takes 5-10 minutes on a modern computer with HandBrake or FFmpeg at default quality settings. Embedding soft subtitles without re-encoding (FFmpeg -c copy) takes under 1 minute for the same video.
Do burned-in subtitles reduce video quality?+
Only if you use low quality encoding settings. HandBrake's "High Profile" preset and FFmpeg's -crf 18 setting produce near-lossless quality. The subtitle text itself does not degrade the picture—quality loss comes from compression applied during re-encoding.
Can I add multiple languages to one video?+
Yes. Use bilingual captions in Subtitle style to show the original and translation together, with a separate font, size and color for each line. Export an MP4 for permanently visible text. Separate SRT/VTT files or multiple embedded tracks give compatible players a language choice.
What file format should I use for subtitles?+
SRT (SubRip) is the most widely supported format. It works with HandBrake, FFmpeg, VLC, YouTube, Vimeo and most video editors. Use WebVTT (.vtt) for HTML5 web video players. For maximum compatibility, keep an SRT as your master file and convert to other formats as needed.
Can viewers turn off burned-in subtitles?+
No. Burned-in subtitles are part of the video picture and cannot be removed or toggled. If you need subtitles that viewers can turn off, use soft subtitles (separate SRT file) or embedded subtitle tracks instead of burning them in.